Thursday, October 31, 2013

TIME MACHINE::PART II:: Nostalgic Sketching - Adolescence Artwork

And this was during my early adulthood (ok... I sounded pretty much "senior" right now lalala~), it was after my secondary school era till I hit college and university timeline. Well, due to the short span, I did not produce much sketch nor really store them, I was more into life-decision making all the time (ok... I am bluffing... did I? of course no... bahaha I was busy doing nothing). I sketch only when I am really into the mood of expressing my world of imagination back then. Rugi me~

 
 My room few years ago before we moved out to our place right now
FYI, this room and the house was on JALAN COCHRANE quarters in Kuala Lumpur that have been demolished by now for constructing MRT array huhu (we were among the last occupants on that piece of land... no more British-like houses where lots of door were installed in the house, missing that atmosphere *sigh*)


Yup as you guess, this is my left hand where I clenched into a cute fist and I sketch using the other hand
I am a right-handed, where most of art peeps are lefties, so I would definitely not considering myself as one of them, I am just a plain jane with hobby sketching hehee~ 


This was a rendition of one of my favourite art pieces submitted to my art teacher during school
What I did was flowers in "FLORA" block text. I did not really get the idea of why the teacher pat me on the back (he did not explain a thing) but I like my product too. =)


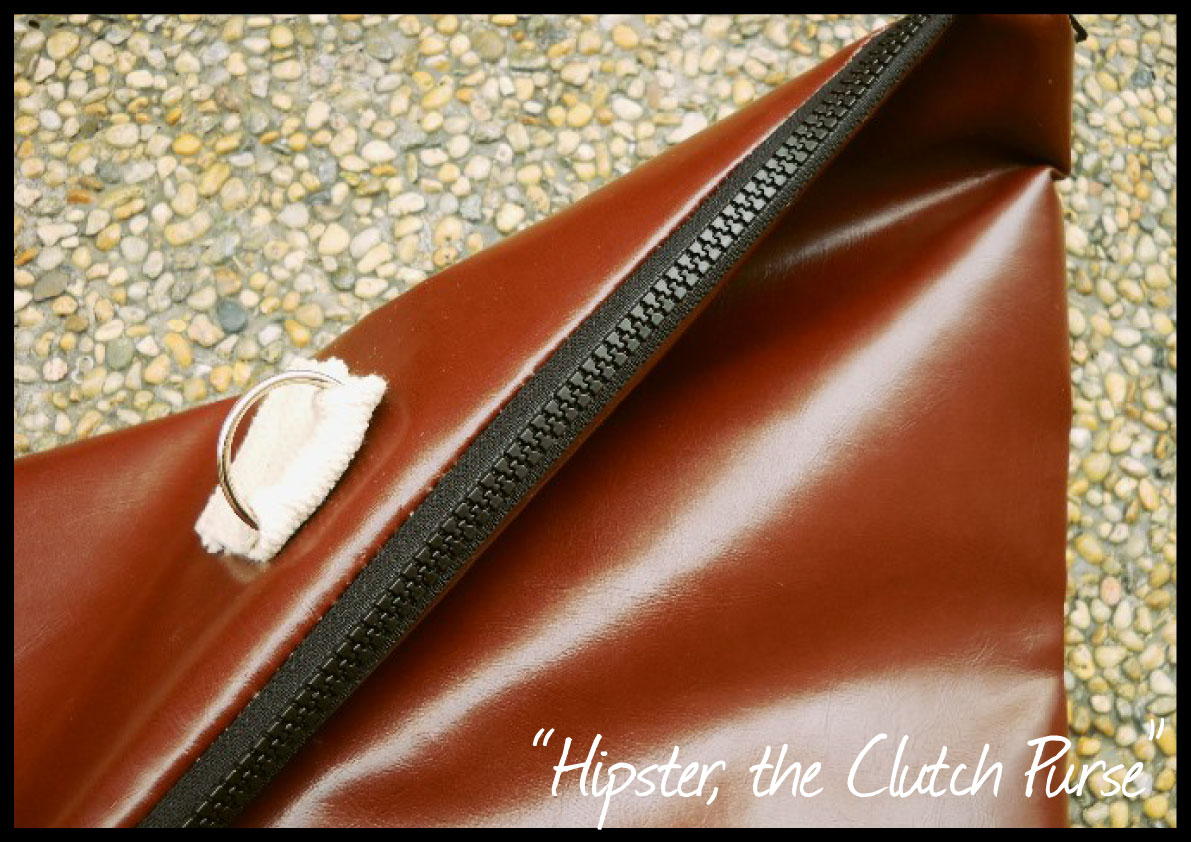
This was when I decided to turn my art piece into something-sewn.
Inspired by MJ military jacket, I rendered mine into a red velvet piece with black velvet epaulets all over! It was a fun project though I did not sport it in the public due to the prototype condition and I gained some weight bahaha (this is in XS size or size 2 i guess)


Tadaah~
Cute isn't it? Do apologize for the torn upper epaulet... haha


Monday, October 28, 2013

TIME MACHINE::PART I:: Nostalgic Sketching - Childhood Artwork

Ok. Not too childhood, it was during tweenage and teenage era, to be exact! (there is no way I have ever store any of my childhood's artwork huhu)


I found these sketching in few places at home. Yep, I hoard things like these since I learnt how and where to store them. wuhuu. It reminds me of how reserved myself was, back then in those old days that subsequently resulting in me expressing my emotions through pencils, pens and papers. I used to be the only child for quite some time and prefer to swim in the ocean of books by myself. And, unfortunately, due to my not-so-sophisticated image back then, well, I did not blend well with the crowd. I would definitely say I am a late-bloomer. So there you go, those stationery were my best friend during school.

          I could not recall on what inspired me to sketch but I do sketch at a very young age. The strokes and style kept changing simultaneously with my age. I am posting a few of my artwork for you to reminisce your nostalgic memory during tween and teen (or perhaps you are experiencing these period this moment, this post will give you the idea what you will encounter in the future eiceh). Though, our experiences might not be the same,well at least it reminds you of how well you developed into what you are today. We as human are good in that. Well, I certainly do developed, I am more vocal and expressive these days with a lil' touch of aggressive-ness weee~


My family and my rendition of our then house


I remembered doodling a similar "Mini Roller Coaster" on someone's biography book


These were my signature during school
Hey... there is one in school baju kurung wuhuu~


I was an avid fan of Pilot's Gel Pen back then (note the different points used)
The only colored doodle character was a teacher whom I could not recall which one huhu
The big "Flowers in Flower" was a rendition of one of my artwork kept by my Art Teacher in school


There was one inspired by Anime


This was rendered using pencil


And I started to doodle fashion illustrations... well, it's a girl thing aite?
This one was on a normal A4 paper, it's crinkled so bad huhu


This piece was rendered in pencil colors and touched by brush and water


A friend used to say that she wanted the 1st doodle as her wedding gown. Unfortunately she's married now and I haven't got any chance to produce anyone's dress (yet) huhu


I wondered why did I left the other 2 not rendered in color? hmm...


A not-so-haute-couture pieces lalala~ (berangan je lebih)


          So these were all when I was about 14 - 17 years old during secondary school. More towards girl thang and stuff. Stay tuned for PART II and PART III. More to come wuhuu~


Friday, October 25, 2013

Aefa Aerisya's Customized Running Man A4 Clutch Purse

Hello peeps. Hello Aefa Aerisya.


It has a been a while since I sketch anything. Well, I am more in the mood to sew rather than sketch these few weeks back. I might as well need to replace my tagline from "A Hand-Sketch Enthusiast" to "A Sewing Enthusiast". ohoho. Frankly I am between these both, torn between'em. However I would ultimately regard myself as the predominant title. *wink wink*...

          Alright, BACK TO THE ENTRY, today I finalized a product for a customer from East Malaysia, Aefa from Memory Lane. She is an avid fan aka kipas-susah-nak-mati of Korean Entertainment Industry and of course, she requested me to sketch RM (Running Man team) on the product. Oh ya, she asked for an A4 Clutch Purse with a brilliantly creative idea of donning the RM concept of pulling the back name Velcro sticker tag.

          Well, if any of you watch Korean show occasionally or full-time, you will definitely digest what I have mentioned just now wuhuu (I doubt Malaysian would not know this... and to be honest, I may be the only Malaysian who does not watch Korean on TV a lot... err... I am not authorized to dominate the remote control at home, sedih... sigh~). Scroll down to know more about the product...


 The Running Man team on the go! 
(I recognized only 2 members here... Kim Jong Kook & HaHa wuhuuu well... not bad for me huh?~)


The front - all 8 members of RM


The back - this is the brilliant idea of Aefa's that I mentioned before!
"VELCRO STICKER NAME TAG"


See... the Velcro sticker! I am loving this concept.


Tadaa... a pull-out name tag of AEFA AERISYA's
(Aefa, the sticker is quite "strong" huhuhu you might have to apply a full force to pull it off~ just a friendly reminder ni)


A familiar cotton webbing & half metal ring


I am using red normal zipper & matching red stripes inner fabric


This is something new I incorporate (wow!) in sewing clutch purses
A wide matching pocket to store phones etc.


          I am about to Poslaju this baby in a few hours time! Watch out for your mail Aefa!!! wuhuu... Hoping so much you'll love this baby dearly~~~


**Status: ARRIVED on Monday, 28th Oct 2013**


Saturday, October 19, 2013

My Hipster Faux Leather Clutch Purse!

Hello Again!
I am in the mood to sew things wuhuu! 


Apart from Clutch Purses that I made for Salina and Shabana,I made myself a gigantic Clutch Purse made out of faux leather purchased from Kamdar. So I named it "Hipster, the Faux Leather Clutch Purse" as it spells chic-ness & hipster-ness as soon as you eye this baby. This is literally to replace my "Block, the Clutch" that aged and fray-ed due to everyday wear & tear. I thought of re-doing the whole precedent clutch but I ended up in destroying the shape! Thus, I hunt for fabric and discover the brown faux leather so I decided to make a huge Clutch Purse to hoard things along where ever I go tiheee~


"Hipster, the Faux Leather Clutch Purse" - the front view, folded into 2
It is of 16" x 16" (non-folded)
And of 16" x 9" (folded)


"Hipster, the Faux Leather Clutch Purse" - the not-so-side-view, folded into 2
I used a thick Khaki Cotton Webbing to fasten the clutch with 2 half metal rings


"Hipster, the Faux Leather Clutch Purse" - the front view, non-folded


So this is the "Separating Zipper" from "Block, the Clutch"


This is Me sporting "Hipster, the Clutch Purse" today.
I am also sporting a Camera-Necklace, a dear gift from my dear friend Syazwani from Si Arnab Gemok


Clutch Purses for Salina & Shabana this Weekend!

Hola Guys. Hola Salina and Shabana Sabrina Azhar 
(I just love pronouncing her entire registered name huhu it do sounds perfect for each other).


Today I got a chance to meet up and catch up with another 2 of my best buddies; Salina and Shabana! And we had lunch at Berjaya Times Square's Secret Recipe. Thank you so much Ina for treating us lunch! Kenyang walau makan laju-laju huhu. We were in a hurry as Bana was in her 1-hour lunch break (she's a manager in training in H&M Malaysia). Afterwards, Salina and I followed Bana to H&M (well... almost run to be exact! Time was ahead of us and Bana needs to "punch" her card). We arrived (short of breath bahaha) at Kids Section and wander around for few stuff and peeking at Bana while she's on duty wuhuu. The meeting was extremely short but we had fun chit-chatting and laughing all the way. 

          Same as previous, I made these 2 hotties each, a "Mini Zoo, the Clutch Purse" (if any of you is my humble blog avid reader, you'll notice this is this range but in a clutch purse version weee...). Both are of similar design and measurement but different stitching methods for the inner fabric (after all, no one really gaze at the inside, aite? do you? huhuu). I let them chose either one for themselves. One is of obvious hem (on the inside of the clutch) and another one of hidden hem. Either way, they are identical twins! So this is it...


"Mini Zoo, the Clutch Purse" - front view, folded into 2
It is of 13" x 16" (non-folded)
It is of 13" x 9" (folded)
The upper part is Mini Zoo linen 
The lower part (orange) is plain linen

"Mini Zoo, the Clutch Purse" - not-so-side-view, folded into 2


"Mini Zoo, the Clutch Purse" - front view, unfold


"Mini Zoo, the Clutch Purse" - not-so-side-view, unfold


The inner fabric is Daiso's Polyester.
It is with gray normal zipper.


As usual, mini Cotton Webbing accompanied by half metal ring to cling on keychains
Perfect to tote these Clutch Purses under their tiaks. hehe~


Shabana & Salina with Me in the middle at Berjaya Times Square 
(ya I know...finally right? A photo of me lalala~)


Salina & Me at H&M


Shabana while on duty (this was Salina's job for snapping curi-curi photo of her haha 
*raise my two hands*no... saya tak bersalah*


Purchased these Iron-on Patches at RM 12.90/3pieces


          Hope they tote these babies with them every single day! Oh we had so much fun in H&M just now! Am going to consult Bana for fabric inventory and register in the future!!!


Monday, October 14, 2013

DIY #3: How to Sew an extremely simple Fridge Cover

Hello. How's your day?


          I am posting my 3rd DIY Tutorial on how to sew an extremely simple FRIDGE COVER. This piece that I produced was actually for someone who requested me to sew her curtain for her hall. She is a neighbour btw. It was my mom's idea to give this Fridge Cover as a complimentary to the whole curtain set. So this is it...

You will need Outer Fabric (of your choice, mine was THE curtain fabric),
Inner Fabric (cotton will do, a no-no to "slippery" fabric as you don't want the piece to slide when there's mass in the pocket or when the wind blows),
a 4mm thick Sponge layer (you can skip this if you want to)
and Curtain Embellishments (from any fabric store and you can skip this as well)


::::::::::::::::::::::::::::::::::::::::::::::::::::::::::::::::::::::::::::::::::::::::::::::::::::
*Tips #1: Please add some 0.5" for every edges of cut fabric for allowances*
::::::::::::::::::::::::::::::::::::::::::::::::::::::::::::::::::::::::::::::::::::::::::::::::::::
Prepare each set of these for Outer Body and Inner Body:
1 piece of 20" x 44" (main body)
2 pieces of 20" x 9" (pockets)
And then, for the 4mm Sponge piece, prepare:
1 piece of 20" x 22"


Place the sponge piece at the middle of the main body of Outer Fabric (wrong side facing you); this is to add body to the Fridge cover when placed on top of the fridge, however you can skip this part, if you wish to wuhuu
Then, place the main body of Inner Fabric on top of the prev combination (right side facing you).
Fold the Outer and Inner Fabric inside and pin'em along the 4 edges.


Sew all the pinned edges.
You may want to place the sewing foot to the edge of the body like the above and start sewing.


As for the pocket body, place both Outer and Inner Fabric (for pocket) with the right sides facing each other, and pin along the dotted lines leaving an 8" gap (for turning the sewn pocket inside out later).
Then, do turn the piece inside out thru the gap and pin the gap's hem. And sew (again) along the 4 edges. You will get 2 pieces of pocket.


Place each of prev. sewn pocket at each end of the Fridge Cover body and pin along the dotted lines like the above. Sew'em.
::::::::::::::::::::::::::::::::::::::::::::::::::::::::::::::::::::::::::::::::::::::::::::::::::::
*Tips #2: Do sew beyond the pocket's opening edge to secure the body (once you place mass into them later in the future)*
::::::::::::::::::::::::::::::::::::::::::::::::::::::::::::::::::::::::::::::::::::::::::::::::::::


Now, place the curtain embellishments at the end of the main body (on top of each sewn pockets) and cut to desired length (together with about 1.5" allowances).
Make sure to double-fold the end to hid the hem and to avoid future fraying.
Pin'em and sew along.


Tadaa~~~
I did place them on my fridge for photo purposes (this piece has landed at the owner's by the time this entry is published)
There are 3 side pockets at each side.


The wrong sides of finished Fridge Cover and the pockets!


              Wish you luck on trying this tutorial! (oh do link me if you made one hehee, I would love to see them!).