Showing posts with label Sketch Theraphy. Show all posts

Tuesday, November 5, 2013

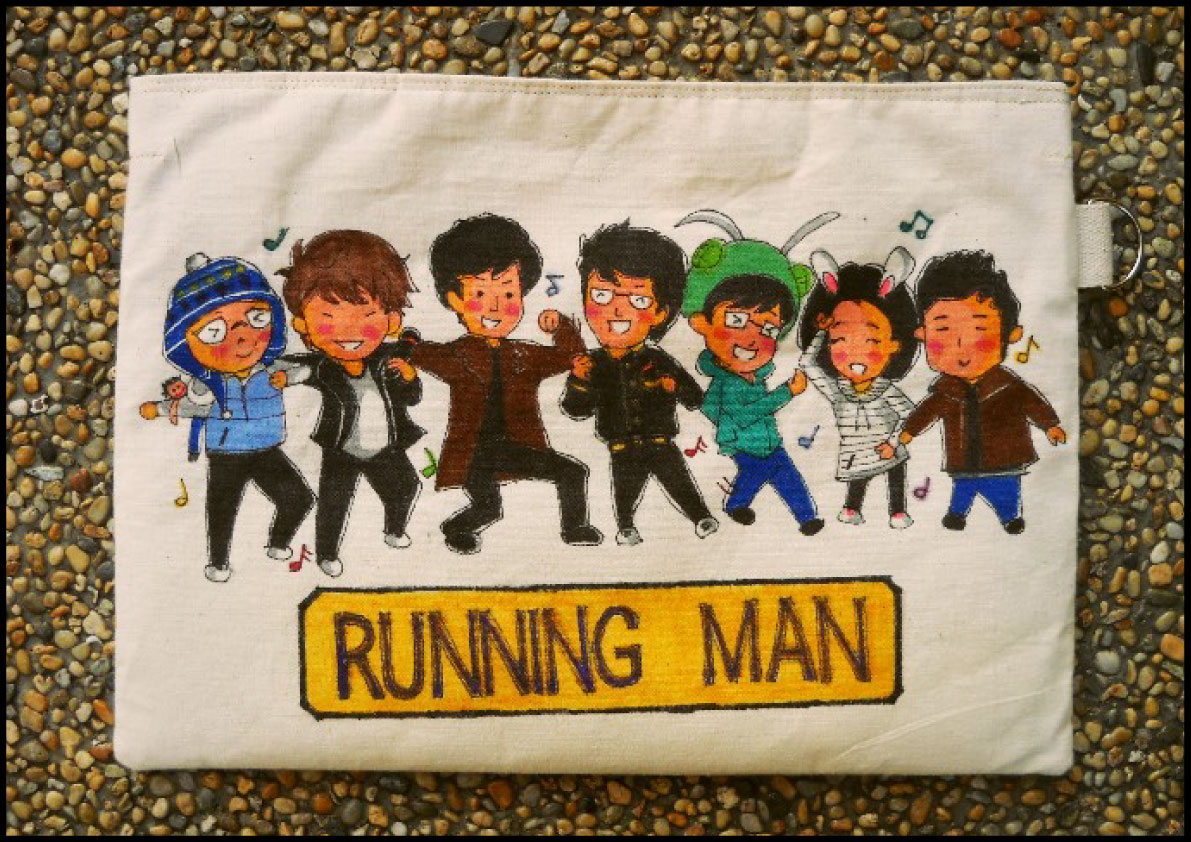
Erma Fatihah's RUNNING Man team Clutch Purse with Velcro Sticker Tag

Hello guys. Hello Erma Fatihahhuhu~


This will be the 3rd RunningMan (RM) concept clutch purse I have ever produced so far, there is definitely a market for these in Malaysia! Well frankly, to be honest... I should have finalize Ila Sharani's Tote Bag project first before this one, however due to shortage of materials, I need to finish this clutch purse beforehand in order to replenish the vital inks for Ila's tote project (stay tuned for this project as it will be the biggest ever project done by Beskot aka me huhu~)

          So, the first Running Man concept clutch purse would be *this one*, a customized clutch purse with RM team on the back and Taylor Swift on the front. It was Syazwani from *Si Arnab Gemoklittle cousin's request
    
          The second would be *this one*, an A4 clutch purse with Velcro sticker name tag concept on the back, creatively requested by Aefa Aerisya from *Memory Lane*. She is an avid fan of Korean Entertainment Industry specially RM! The Velcro sticker name tag spells kipas-susah-nak-mati itself and she even have her own RM t-shirt with the same name tag concept! Awesome!

          Thus this is the third, RM concept A4 Clutch purse requested by Erma for herself. *Thiswas previous project for her SIL's birthday prezzie; "London Greetings". Oh ya, we're adopting Aefa's RM Clutch Purse concept, check these out...


 The Front - animated RM team karaoke-ing
This is just too cute to digest


The Back - RM logo on the Velcro sticker


Pull a lil bit with full force lalala~


A pull off logo


A close up view on the logo sticker tag


Cotton webbing & Half metal ring


This time around, I used a Teal-colored normal zipper with pink-blue inner fabric


One-sided pocket to store phones etc.


          Now, I will let you eye on a close up view of the animated RM characters. I did render them based on the provided photo "lighting shadow". A nice experience on experimenting the shadow technique!


Err... someone help me with these character's name? huhu
Ok, Aefa helped me with their names just now...
So this will be Haha & Jongkook


and these are Kwangsoo & Sukjin


... and Jaesuk, Jihyo & Gary


  **Status: ARRIVED on 6th Nov 2013**

Saturday, November 2, 2013

TIME MACHINE::PART III:: Nostalgic Sketching - Adult Artwork


I noticed that I sketch less these days. Might be due to of real-life-work that we all human require to survive our everyday breath. wow what an excuse. However, because my real-life-job does not relate at all to my sketching hobby, it do takes a toll on my numbers of pieces and the quality. hmm, what-to-do... bahaha. Fret not, I do produce once in a while once I am in the mood or inspired by something and most all all, ONCE I AM IN BOREDOM~


 A classic one-hole paper puncher found at a government's office where I spent less than 2 months part-timing as an N17 before. 


During the same period, once I hit the boredom bell.
I do believe that is a Nivea lotion bottle huhu


One of my favourites  - a Staple


Another fav - my old mini 1GB thumbdrive I bought during Uni years 
The upper animated character relates to my field, if you could guess'em lalala~


This is the REAL thang


These were (hand-)sketches of wedding dresses for my best friend, Erma 
Her event was in the middle of this year, in June 2013
I made *this A4 CLUTCH PURSE* as a wedding gift and *this FABRIC HAND-BOUQUET* as her companion during her Nikah Solemnization at Masjid Terapung, Kuala Terengganu


And these were my renditions (in AI form) of my sketches.
We submitted these to the designer


          Erma pick no. 3 with a slight combination of no. 1


          Thus, this will be the 3rd PART of my Nostalgic Sketching - Adult Artwork. I am producing some more later in the future, do not know when will they appear bahaha. Do scroll over and click on any of my ":: DOODLES ::" for further products hehee

Till then darls~


Thursday, October 31, 2013

TIME MACHINE::PART II:: Nostalgic Sketching - Adolescence Artwork

And this was during my early adulthood (ok... I sounded pretty much "senior" right now lalala~), it was after my secondary school era till I hit college and university timeline. Well, due to the short span, I did not produce much sketch nor really store them, I was more into life-decision making all the time (ok... I am bluffing... did I? of course no... bahaha I was busy doing nothing). I sketch only when I am really into the mood of expressing my world of imagination back then. Rugi me~

 
 My room few years ago before we moved out to our place right now
FYI, this room and the house was on JALAN COCHRANE quarters in Kuala Lumpur that have been demolished by now for constructing MRT array huhu (we were among the last occupants on that piece of land... no more British-like houses where lots of door were installed in the house, missing that atmosphere *sigh*)


Yup as you guess, this is my left hand where I clenched into a cute fist and I sketch using the other hand
I am a right-handed, where most of art peeps are lefties, so I would definitely not considering myself as one of them, I am just a plain jane with hobby sketching hehee~ 


This was a rendition of one of my favourite art pieces submitted to my art teacher during school
What I did was flowers in "FLORA" block text. I did not really get the idea of why the teacher pat me on the back (he did not explain a thing) but I like my product too. =)


This was when I decided to turn my art piece into something-sewn.
Inspired by MJ military jacket, I rendered mine into a red velvet piece with black velvet epaulets all over! It was a fun project though I did not sport it in the public due to the prototype condition and I gained some weight bahaha (this is in XS size or size 2 i guess)


Tadaah~
Cute isn't it? Do apologize for the torn upper epaulet... haha


Monday, October 28, 2013

TIME MACHINE::PART I:: Nostalgic Sketching - Childhood Artwork

Ok. Not too childhood, it was during tweenage and teenage era, to be exact! (there is no way I have ever store any of my childhood's artwork huhu)


I found these sketching in few places at home. Yep, I hoard things like these since I learnt how and where to store them. wuhuu. It reminds me of how reserved myself was, back then in those old days that subsequently resulting in me expressing my emotions through pencils, pens and papers. I used to be the only child for quite some time and prefer to swim in the ocean of books by myself. And, unfortunately, due to my not-so-sophisticated image back then, well, I did not blend well with the crowd. I would definitely say I am a late-bloomer. So there you go, those stationery were my best friend during school.

          I could not recall on what inspired me to sketch but I do sketch at a very young age. The strokes and style kept changing simultaneously with my age. I am posting a few of my artwork for you to reminisce your nostalgic memory during tween and teen (or perhaps you are experiencing these period this moment, this post will give you the idea what you will encounter in the future eiceh). Though, our experiences might not be the same,well at least it reminds you of how well you developed into what you are today. We as human are good in that. Well, I certainly do developed, I am more vocal and expressive these days with a lil' touch of aggressive-ness weee~


My family and my rendition of our then house


I remembered doodling a similar "Mini Roller Coaster" on someone's biography book


These were my signature during school
Hey... there is one in school baju kurung wuhuu~


I was an avid fan of Pilot's Gel Pen back then (note the different points used)
The only colored doodle character was a teacher whom I could not recall which one huhu
The big "Flowers in Flower" was a rendition of one of my artwork kept by my Art Teacher in school


There was one inspired by Anime


This was rendered using pencil


And I started to doodle fashion illustrations... well, it's a girl thing aite?
This one was on a normal A4 paper, it's crinkled so bad huhu


This piece was rendered in pencil colors and touched by brush and water


A friend used to say that she wanted the 1st doodle as her wedding gown. Unfortunately she's married now and I haven't got any chance to produce anyone's dress (yet) huhu


I wondered why did I left the other 2 not rendered in color? hmm...


A not-so-haute-couture pieces lalala~ (berangan je lebih)


          So these were all when I was about 14 - 17 years old during secondary school. More towards girl thang and stuff. Stay tuned for PART II and PART III. More to come wuhuu~


Friday, October 25, 2013

Aefa Aerisya's Customized Running Man A4 Clutch Purse

Hello peeps. Hello Aefa Aerisya.


It has a been a while since I sketch anything. Well, I am more in the mood to sew rather than sketch these few weeks back. I might as well need to replace my tagline from "A Hand-Sketch Enthusiast" to "A Sewing Enthusiast". ohoho. Frankly I am between these both, torn between'em. However I would ultimately regard myself as the predominant title. *wink wink*...

          Alright, BACK TO THE ENTRY, today I finalized a product for a customer from East Malaysia, Aefa from Memory Lane. She is an avid fan aka kipas-susah-nak-mati of Korean Entertainment Industry and of course, she requested me to sketch RM (Running Man team) on the product. Oh ya, she asked for an A4 Clutch Purse with a brilliantly creative idea of donning the RM concept of pulling the back name Velcro sticker tag.

          Well, if any of you watch Korean show occasionally or full-time, you will definitely digest what I have mentioned just now wuhuu (I doubt Malaysian would not know this... and to be honest, I may be the only Malaysian who does not watch Korean on TV a lot... err... I am not authorized to dominate the remote control at home, sedih... sigh~). Scroll down to know more about the product...


 The Running Man team on the go! 
(I recognized only 2 members here... Kim Jong Kook & HaHa wuhuuu well... not bad for me huh?~)


The front - all 8 members of RM


The back - this is the brilliant idea of Aefa's that I mentioned before!
"VELCRO STICKER NAME TAG"


See... the Velcro sticker! I am loving this concept.


Tadaa... a pull-out name tag of AEFA AERISYA's
(Aefa, the sticker is quite "strong" huhuhu you might have to apply a full force to pull it off~ just a friendly reminder ni)


A familiar cotton webbing & half metal ring


I am using red normal zipper & matching red stripes inner fabric


This is something new I incorporate (wow!) in sewing clutch purses
A wide matching pocket to store phones etc.


          I am about to Poslaju this baby in a few hours time! Watch out for your mail Aefa!!! wuhuu... Hoping so much you'll love this baby dearly~~~


**Status: ARRIVED on Monday, 28th Oct 2013**


Wednesday, October 2, 2013

DIY #2: I Made This Lovely Canvas Tote Bag for My Mother's Birthday~~


*************************************************************************************************
Caution: There will be tonnes of photos included in this post. Beware of dizziness. Please do not drive or operate any machinery in case of drowsiness
*************************************************************************************************


          So this is my 2nd tutorial. I have made myself clear that I only wanted, repeat after me, ONLY, to share extremely simple tutorials to all DIY junkie out there (yuhuu~~~). However, you guys just have to bear with me this only entry as I am posting about 20 images at once. Yup, do and please imagine the complexity you will encounter in a minute time from now....(mr.cricket chirping...)...

          Do take note, this time around I sew in inches (still haven't make up my mind yet on which one is better mm/cm or inches). I am using Gusset Zipper technique to complement the whole scene.

       Today (well, yesterday to be exact) is my Ibu's birthday. Ibu is mother/mom/mummy/mama/etc. in Malay. She is 54 today woot woots. Thus, I opted to sew a Customized Tote Bag for her to tag along to places that she goes. First, I bluffed on the reason why I made that particular bag, hehee... to test her new industrial sewing machine (which literally is my new toy machine). Afterwards I finalized the stitching part, then, I sketch the Tote Bag specially for Ibu! (if you noticed, I normally sketch first then I sew... it is an exceptional this time as I need to bluff bahaha). A gentle reminder, once again... please bear with the numbers of the images below...


::::::::::::::::::::::::::::::::::::::::::::::::::::::::::::::::::::::::::::::::::::::::::::::::::::
*Tips #1: Please add some 0.5" for every edges of cut fabric for allowances*
::::::::::::::::::::::::::::::::::::::::::::::::::::::::::::::::::::::::::::::::::::::::::::::::::::
You will need 3 types of fabric for OUTER BODY / INNER BODY / SIDE OUTER & GUSSET ZIPPER (scroll over to know more)
I used Canvas / Polyester / Linen for each respective part.
Bought the Polyester (this is quite rare at Malaysian normal fabric store) at Daiso for RM5/yard I guess.
Oh, you'll also need Cotton Webbing (now I know the actual name of these, I named it "Bag String" previously...lame!) 


As of Canvas fabric:
Make 2 pieces of  15" x 14" (OUTER BODY)
As of Polyester fabric:
Make also 2 pieces of 19" x 12" (LOWER INNER BODY)
2 pieces of 19" x 2" (UPPER INNER BODY)
And 1 piece of 8" x 3.5" (POCKETS)
*You'll sew the Gusset Zipper in between these Upper & Lower Inner Body later*


As of the Linen fabric:
Make 2 pieces of 14" x 4" (OUTER SIDE BODY)
And make 4 pieces of 15" x 2" (GUSSET ZIPPER APPENDAGES)


First, you have to sew the pocket to one of the Lower Inner Body
:::::::::::::::::::::::::::::::::::::::::::::::::::::::::::::::::::::::::::::::::::::::::::
*Tips #2: always sew the most uncared for, the most inner part first*
:::::::::::::::::::::::::::::::::::::::::::::::::::::::::::::::::::::::::::::::::::::::::::
Fold twice the upper part of pocket (creating a hidden hem) and pin'em.
Fold once the lower part and pin'em.
Sew along these pinned edges.


Now, place your hem-ed pocket at the middle of the right side of (any) Lower Inner Body; at 2" from its upper edge and pin'em.
Because we didn't sew the side edges of the pocket just now, you need to fold'em once and pin'em to the Body.
And start sewing along the dotted lines as above (together with a line in the middle to create 2 pockets instead of 1 huge space).
Do not sew the upper part or else it won't be functioning as well... a pocket~


Place those Linen Outer Side Body to each right and left part of 1 piece of Canvas Outer Body (right sides facing each other), pin'em and sew along the dotted/pinned lines.
Take another piece of Canvas Outer Body and pin it to the rest of the prev. combination and sew'em creating an illusion of a box without cap or base (could you get this?)
Then, you sew the bottom of the combination leaving only 1 open (un-sewn) upper part.
:::::::::::::::::::::::::::::::::::::::::::::::::::::::::::::::::::::::::::::::::::::::::::::::::::::::::::::::::::::::::::::
*Tips #3: Always, and always trim off each sewn edge for a cleaner look*
*Tips #4: Because no hem/edges will show off on this Tote bag, we might as well forget about 
"Overlock-ing" the hem using machine*
::::::::::::::::::::::::::::::::::::::::::::::::::::::::::::::::::::::::::::::::::::::::::::::::::::::::::::::::::::::::::::


By open up the combination, create a box resemblance (maybe by placing a 1.5L water bottle inside it haha).
Now, you will have a triangular appendage each side like those (this have to go away later).
Mark along like the above, 2" from the corner-end and pin'em.


Sew the marked line and trim the triangles off (2 of them!).


For the Gusset Zipper Appendages; place 2 pieces of Linen for the Gusset (right sides facing each other), pin along these dotted lines and sew'em. You will get 2 sets.
You will later place a 24" zipper in the middle.
::::::::::::::::::::::::::::::::::::::::::::::::::::::::::::::::::::::::::::::::::::::::::::::::::::::::::::::::::::::::::::::::
*Tips #5: I should sewn a "cover" at each zipper end but to reduce the length of this entry, yup, I am skipping'em tihee*
::::::::::::::::::::::::::::::::::::::::::::::::::::::::::::::::::::::::::::::::::::::::::::::::::::::::::::::::::::::::::::::::


Once sewn, turn those appendages inside out.
Place both of them on the zipper (well at the middle of the whole length I guess, with the right side of the zipper facing you), pin'em and sew along those dotted lines.


Carefully, place the Gusset combination on top of a Lower Inner Body (with pockets) at the upper edge, and 1 piece of Upper Inner Body (with wrong side facing you) on top of those combination. Pin'em and sew along the dotted lines.


Now, do the same for the other half of Inner Body combination.
Once sewn, trim off the hem for a cleaner look.


This is how the finished Inner Body will look like (wrong sides must be ultimately facing you).
Center the combination and pin'em and sew along those dotted lines.
Be careful not to sew the zipper end along, you may fold them and pin first to avoid these. 


By referring on how do you trim off the triangles of the Outer Body, do the same for your Inner Body.


And the trickiest part of all. 
Face both Outer and Inner body (wrong sides still facing you) like the above, and pin along the dotted lines leaving a 10" gap on any front Body side. Sew'em.
::::::::::::::::::::::::::::::::::::::::::::::::::::::::::::::::::::::::::::::::::::::::::::::::::::::::::::::::::::::::::::::::::
*Tips #6: This was a terrible mistake of mine, maybe next time we should opt by leaving the gap at the bottom hem of Inner Body for turning the bag inside-out conveniently*
::::::::::::::::::::::::::::::::::::::::::::::::::::::::::::::::::::::::::::::::::::::::::::::::::::::::::::::::::::::::::::::::::


Turn the bag inside out and... voila~
And remember to sew along those dotted edge to close up the gap and for adding body to the bag.


See the difference?


Okay. The Final part.
Prepare 2 pieces of 30" long Cotton Webbing.
Mark at 3" from each end.
Now, fold twice to create the (hidden) hem of about 1" long and pin'em.


Place each end at 4" from front Body edge and 1.5" from upper Body edge like those.
Sew'em.
Next, sew each of 4 edges of the bag to add some body as our last touch!


Yippie Yayyy~
#1: The Front ("The World's Greatest Ibu" badge sketch)
#2: The Back ("Take Me with You to These Places List")
#3: The Gusset zipper
#4: The water-proof Polyester Inner


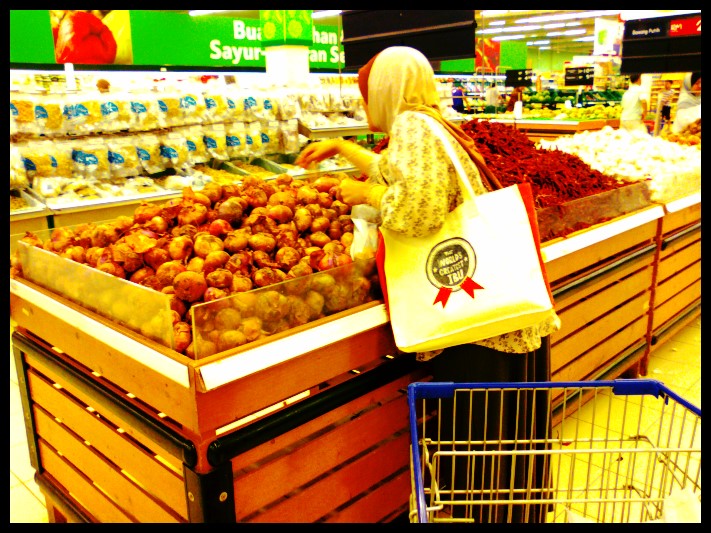
Tick on Checkbox #3: Tote Me to Tesco!


          Ibu love this piece and laugh at the back wordings. Yeayyy happy that my Ibu love this part of me, myself. 


Till then.